
Stucco Damage Warning Signs You Should Never Ignore
Stucco Damage Warning Signs You Should Never Ignore: How to Identify and Act Early
Early recognition of stucco damage warning signs lets homeowners stop small problems from turning into expensive repairs and hidden moisture damage. This guide explains what visible indicators—like cracks, discoloration, bulging, efflorescence, mold, and soft spots—actually mean, why they occur, and the practical actions you can take right away. Understanding stucco damage mechanisms such as moisture intrusion, flashing failure, and freeze-thaw stress helps you prioritize inspections and choose appropriate repairs. The article walks through the most common warning signs, how moisture causes progressive stucco failure, the different crack types and their seriousness, clear thresholds for calling a professional, a step-by-step homeowner inspection checklist, Alberta-specific climate impacts, and the repair options used to fix common damage. Throughout, you’ll find checklists, comparison tables, and diagnostic tips—so you can identify true signs of stucco failure and decide when to monitor, patch, or contact a pro.
What Are the Most Common Stucco Damage Warning Signs?
Common stucco damage warning signs are the first visible clues that the building envelope is compromised, and they usually reflect underlying causes like moisture intrusion, poor installation, or structural movement. Recognizing these signs early enables targeted investigations—visual documentation, tap-testing, or moisture readings—so you can prevent escalation to rot, mold, or retrofitting. Below is a concise list of the top visual indicators homeowners should prioritize, with immediate homeowner actions to follow. Understanding these visible indicators leads naturally to examining specific crack morphologies and other diagnostic cues in greater detail.
The most frequent visible warning signs of stucco damage include:
- Visible cracks in the finish: Cracks often signal movement or stress in the cladding and may allow water entry if left untreated.
- Discoloration and staining: Dark stains and white salt deposits indicate moisture pathways behind the surface and possible efflorescence.
- Bulging or blistering areas: Delamination shows as bulges or bubbles in the finish and usually indicates trapped moisture.
- Mold or mildew growth: Biological growth on stucco points to persistent dampness and ventilation issues.
- Soft, hollow, or crumbling sections: Loss of integrity in the stucco or substrate indicates serious moisture or freeze-thaw damage.
This quick list helps prioritize what to document during an inspection, which leads into how to differentiate crack types and what each pattern typically signals.
How to Recognize Different Types of Stucco Cracks
Different stucco cracks—hairline, spiderweb, and stair-step—have distinct appearances and diagnostic implications that help determine severity and cause. Hairline cracks are thin, often cosmetic fissures in the finish coat and usually reflect shrinkage or minor thermal movement; they can be monitored but still warrant sealing to prevent water entry. Spiderweb cracks are multiple intersecting fine cracks across a field and often point to substrate movement or poor curing; they increase the risk of moisture ingress if left untreated. Stair-step cracks follow mortar joints or brick coursing and frequently indicate differential settlement or structural movement; these require closer evaluation because they may signal foundation-related problems. Measuring crack width and noting whether cracks propagate through multiple layers (finish to base) helps decide between cosmetic repairs and structural investigation.
Careful documentation—photographs, measurements, and dates—lets you track propagation and informs whether repairs should be patching, resealing, or a more comprehensive remediation.
How to Identify Water Damage and Efflorescence in Traditional Stucco?
Water damage and efflorescence present specific visual and tactile clues that should change the repair scope from surface patches to substrate fixes. Water-stained discoloration, soft or powdery substrate, and bulging indicate active moisture behind the stucco; a moisture meter reading or probing the substrate confirms penetration. Efflorescence appears as white powdery salts on the surface where soluble salts migrate with moisture; while surface cleaning removes salts, the underlying moisture path must be corrected to prevent recurrence. Because sealing or patching without addressing flashing, roof drainage, or failed weep screeds allows continued deterioration, diagnosing and eliminating the moisture source is essential prior to any cosmetic work.
What Does Stucco Discoloration Indicate?
Stucco discoloration appears in several forms—dark water stains, greenish algal growth, and white mineral deposits (efflorescence)—each pointing to distinct moisture dynamics and severity. Dark stains typically indicate recent or ongoing moisture exposure from leaks, failed flashing, or poor drainage and are often accompanied by dampness on touch. Algal or organic staining suggests recurring surface moisture plus nutrients, usually from shaded, poorly ventilated areas; cleaning and moisture control are the first steps. Efflorescence on stucco represents soluble mineral salts left behind when water evaporates from the substrate; it’s a clear sign of repeated moisture movement through the system and warrants investigation of entry points. Simple spot tests—feeling for dampness behind a stain, checking nearby flashings, or noting if staining reappears after drying—help determine whether discoloration is cosmetic or a sign of deeper stucco water damage.
Understanding staining patterns leads directly into inspecting for bulging or delamination that often accompanies trapped moisture.
How Can You Identify Bulging or Blistering Stucco?
Bulging and blistering appear as raised areas where the finish coat separates from the scratch or base coat, and they almost always indicate trapped moisture or adhesion failure. Visually, bulges are rounded elevations that may crack around their edges; tactilely, they can sound hollow when tapped and often worsen after wet weather. Causes include water entering at joints or openings, poor bonding during installation, or moisture vapor trapped by impermeable finishes. Because delamination conceals the extent of damage beneath the surface, homeowners should document bulges, avoid puncturing them, and flag them for professional assessment when they grow or are widespread. Temporary protective steps—safeguarding the area from further water exposure, recording photos, and scheduling a diagnostic inspection—help limit additional deterioration.
Prompt assessment of bulging leads into examining biological growth, which often accompanies moisture problems in delaminated areas.
What Are the Signs of Mold and Mildew on Stucco?
Mold and mildew on stucco show as patchy discoloration—black, green, or brown—that often has fuzzy or spotty textures and can appear in shaded areas or where moisture accumulates. Biological growth indicates persistent damp conditions, poor drying, or trapped moisture behind the stucco; it also poses indoor air-quality and health concerns if allowed to spread. Small, isolated patches may be cleaned with appropriate biocidal cleaners and followed by moisture mitigation, but widespread growth—especially near penetrations or beneath finish delaminations—requires professional remediation. When mold is present, document locations, avoid scraping without protection, and prioritize diagnosing the moisture source to prevent recurrence. Understanding the link between mold and moisture control prepares homeowners for the inspection techniques described next.
Identifying mold makes it important to test for soft spots and crumbling stucco, which can hide structural decay.
What Are Hairline, Structural, and Spiderweb Stucco Cracks?
Hairline, structural, and spiderweb cracks each indicate different failure mechanisms and demand different responses. Hairline cracks are thin, typically less than 1/16 inch, often cosmetic and caused by shrinkage or minor thermal movement; they can usually be sealed or filled after cleaning. Structural cracks are wider, may be stepped at corners, or run through multiple coats and can indicate foundation settlement, framing movement, or lath failure; these require thorough diagnosis and likely professional repair. Spiderweb cracking is a network of fine fissures across a localized area, commonly from poor substrate prep or an overly stiff finish; remediation usually includes localized removal and reapplication to reestablish proper bond and flexibility.
How to Detect Soft Spots and Crumbling Stucco
Soft or crumbling stucco indicates loss of substrate integrity and often reflects longer-term moisture exposure, freeze-thaw damage, or material degradation; these areas are higher-risk and may hide rot or insulation damage. Homeowners can perform a gentle tap test using the back of a screwdriver handle or a knuckle—solid stucco sounds sharp and crisp, while hollow or soft areas produce duller, thudding sounds and may flake away under light pressure. Visually, crumbling appears as granular breakdown, sagging, or missing sections, often near ground level or at transitions where moisture concentrates. If testing reveals soft spots, homeowners should document the locations and avoid aggressive probing that could enlarge the damage; these findings typically trigger a professional moisture diagnostic and repair plan. Confirming soft areas naturally leads to examining how moisture intrusion causes these progressive failures.
Before moving to moisture mechanisms, review the quick-reference diagnostic table below to match damage entities with probable causes and visible indicators.
Different damage types, their likely causes, and what to look for.
Damage Type | Likely Cause(s) | Visible Indicator |
Cracks (hairline/spider/stair-step) | Thermal movement, settling, poor installation | Line fissures, pattern type, width > 3 mm raises concern |
Discoloration / Staining | Water leaks, algae growth, salt migration | Dark stains, green growth, white powdery deposits |
Bulging / Blistering | Trapped moisture, adhesion failure | Raised areas, hollow sound on tap, cracking around edges |
Mold / Mildew | Persistent dampness, poor ventilation | Black/green patches, fuzzy texture, recurring after cleaning |
Soft / Crumbling Areas | Freeze-thaw, prolonged moisture, substrate decay | Granular breakdown, sagging, flakes under light pressure |
How Does Moisture Intrusion Cause Stucco Damage?
Moisture intrusion causes stucco damage by entering the cladding system and initiating chemical and mechanical processes—mineral salt movement (efflorescence), freeze-thaw expansion, biological growth, and adhesion failure—that progressively degrade finish and substrate. Water that breaches flashings, sealants, window perimeters, or compromised joints becomes trapped, leading first to staining and efflorescence, then to blistering, rot of underlying sheathing, and eventually to delamination or structural damage. Early detection focuses on identifying stains, localized softening, and failing sealants around penetrations, because these early signs often allow targeted repair rather than wholesale replacement. Understanding these mechanisms informs both preventative measures—like proper flashing, positive drainage, and flexible sealants—and diagnostic strategies that professionals use to measure moisture and plan repairs.
Recognizing water entry patterns leads to identifying early visual signs and the specific construction failures that create moisture paths.
What Are the Early Signs of Stucco Water Damage?
Early signs of stucco water damage include localized dark staining, white salt deposits (efflorescence), small blistering, and damp or cool-to-the-touch areas near windows, rooflines, or grade transitions. These indicators often appear before obvious structural deterioration and should prompt closer inspection—documenting photos, gently probing suspect areas, and checking adjacent flashing and weep routes. Because water migration can follow unexpected paths, pay particular attention to staining below roof intersections or at corners where water can accumulate. Identifying these early signs makes it possible to address leaks quickly and prevents the progressive failures described in the next subsection.
How Do Poor Drainage and Flashing Failures Affect Stucco?
Poor drainage and flashing failures create persistent moisture exposure that erodes stucco from the back side and concentrates water at sensitive junctions like windows and rooflines, accelerating efflorescence, blistering, and substrate decay. Proper flashing channels water away from the wall assembly; when flashings are absent, improperly installed, or sealed poorly, water can enter the cavity behind the stucco and migrate downward. Similarly, grading that allows soil splashback or gutters that overflow increase repeated wetting at lower walls and foundations. Inspecting the condition and continuity of flashing, gutter performance, and ground slope highlights the most common moisture sources and informs repair priorities that prevent recurring water intrusion.

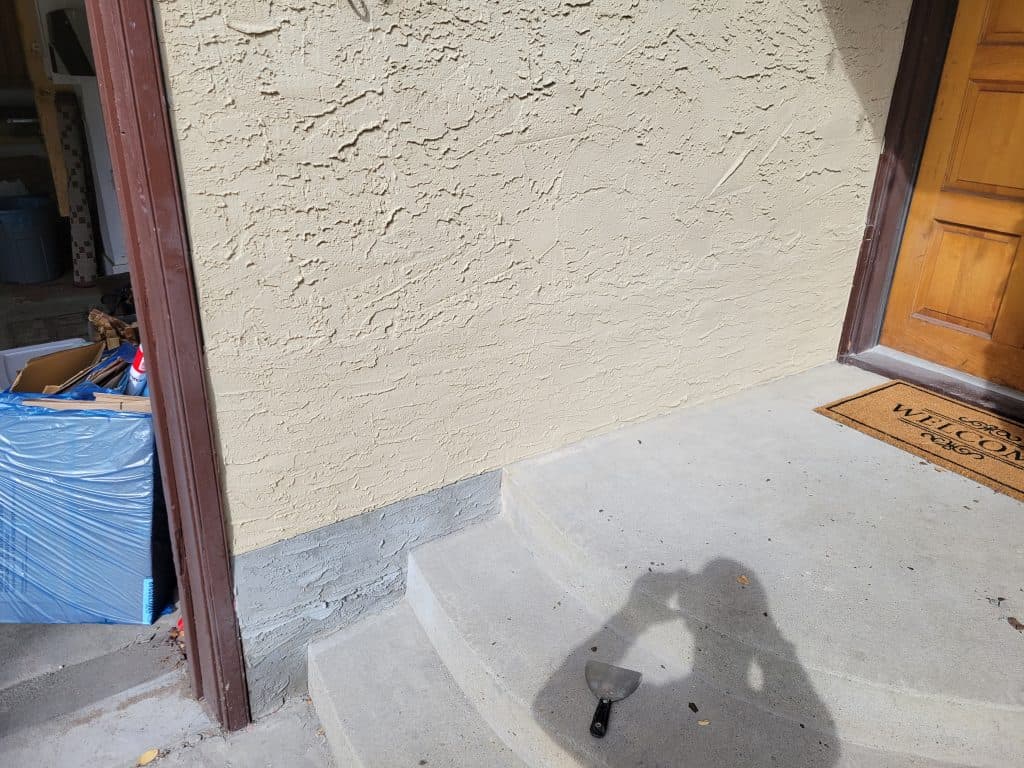
Why Is Efflorescence a Warning Sign of Moisture Problems?
Efflorescence forms when soluble mineral salts dissolve in water and are carried to the surface as moisture evaporates, leaving a white, powdery residue—this process directly signals moisture migration through the stucco system. Efflorescence is not merely cosmetic; it pinpoints moving water and suggests chronic wetting that can precede deeper damage like rot or delamination. Simple verification includes wetting the area to see if salts reappear after drying and inspecting nearby penetrations or grading for sources. Because efflorescence indicates ongoing water pathways, addressing it requires fixing the moisture source—improving flashing, drainage, or sealants—rather than only removing surface salts.
Addressing efflorescence and water sources is essential before considering repair methods, which we cover later.
What Causes Stucco Cracks and How Serious Are They?
Stucco cracks arise from a handful of root causes—foundation settling, thermal expansion and contraction, improper installation, and mechanical impacts—and their seriousness ranges from cosmetic to structural depending on shape, width, and propagation. Small hairline cracks often reflect normal shrinkage and can be sealed, while stair-step or through-wall cracks that cross materials or grow over time may indicate foundation movement or differential settlement and require structural assessment. Evaluating cracks involves measuring width, tracking growth over time, and correlating location with building movements (near corners, openings, or rooflines). Understanding the cause-behavior link helps determine whether a stucco crack repair or a more comprehensive structural intervention is necessary.
After exploring crack causes, we examine specific crack morphologies and how to interpret them in practice.
What Are Hairline, Spiderweb, and Stair-Step Cracks?
Hairline cracks are narrow, often less than 1 mm, usually caused by shrinkage in the finish coat and typically remain cosmetic if sealed quickly. Spiderweb cracks form as multiple fine intersecting lines and can indicate surface-layer distress or substrate movement; while sometimes cosmetic, they increase the surface permeability and should be monitored. Stair-step cracks that trace masonry joints or brickwork usually signal differential movement or settling; because they commonly traverse multiple materials, they have a higher chance of indicating structural issues and require prompt evaluation. Measuring, photographing, and noting whether cracking increases over weeks to months helps differentiate cosmetic cracks from those necessitating professional intervention.
How Do Foundation Settling and Temperature Changes Lead to Cracks?
Foundation settling produces differential movement between adjacent wall sections, concentrating stress at weak points like corners and openings and often creating stair-step crack patterns; this movement is gradual but cumulative. Temperature-driven expansion and contraction impose cyclic stresses on stucco systems, especially where materials with different thermal coefficients meet, causing hairline or pattern cracking over time. Seasonal monitoring helps distinguish thermal movement—often reversible and seasonal—from progressive settling that widens cracks. If cracks widen, or if doors and windows bind or shift, consult a structural or stucco professional to determine whether repairs can be localized or require foundation stabilization.
When Are Stucco Cracks a Sign of Structural Problems?
Cracks become a structural warning when they widen over time, run through multiple construction layers, are accompanied by misaligned doors/windows, or appear in stair-step patterns along masonry joints; these patterns suggest movement beyond normal thermal or shrinkage stresses. Red flags include cracks wider than about 3 mm, cracks that propagate rapidly, and those associated with bulging or significant substrate softening—each increases the probability of underlying framing or foundation issues. When such signs appear, emergency protections (tarping, diverting water) can limit further damage while you secure a professional inspection. Prompt assessment prevents small repair bills from ballooning into retrofitting and structural remediation costs.
When Should You Call a Professional for Stucco Repair?
Call a professional for stucco repair when visible signs or test results indicate active moisture intrusion, widespread delamination, structural movement, persistent mold, or significant softening of the substrate that DIY measures cannot safely resolve. Professionals use diagnostic tools—moisture meters, probes, and thermal imaging—to quantify hidden moisture, locate leaks, and define repair scope; their assessments separate easily patched surface problems from cases that need sheathing replacement or retrofitting. Delaying professional inspection increases the risk of rot, mould infiltration, and escalating repair costs. The following checklist lists immediate-action situations that warrant expert attention and helps homeowners prioritize interventions.
- Widening or propagating cracks: Cracks that get larger over weeks indicate progressive movement and need evaluation. (
- Bulging or delamination across multiple areas: Large blistering suggests trapped moisture and hidden substrate damage.
- Persistent or recurring efflorescence and staining: Indicates chronic moisture pathways requiring diagnostic testing.
- Soft, hollow, or crumbling stucco: Loss of integrity implies substrate decay and often requires professional remediation.
What Stucco Damage Warrants Immediate Expert Attention?
Immediate expert attention is warranted for wide or growing cracks, extensive bulging or blistering covering multiple wall areas, significant softening or crumbling, and pervasive mold or mildew indicating systemic moisture problems. Such conditions often hide sheathing rot, compromised insulation, or structural movement that require invasive diagnostic probing and moisture mapping, which are beyond DIY capability. Short-term homeowner measures—sheltering exposed areas from rain, documenting extent with dated photos, and avoiding temporary patches that mask problems—can limit damage while a pro performs a diagnostic. Timely professional assessment reduces the chance of progressive deterioration and more costly retrofitting later.
How Do Professionals Use Tools Like Moisture Meters for Inspection?
Professionals use moisture meters, invasive probes, and thermal imaging to detect hidden wetting, map moisture distribution, and prioritize invasive investigations—each tool revealing different aspects of water presence and thermal anomalies. A pin-type moisture meter measures moisture content in sheathing, while a non-invasive meter detects elevated moisture beneath the surface; thermal imaging highlights temperature differentials often caused by damp insulation or evaporative cooling. Interpreting tool outputs in context—correlating meter readings with visible damage and construction details—lets technicians determine whether spot repairs, localized replacement, or full retrofitting is necessary. These objective measurements are essential for a repair scope that addresses root causes rather than masking symptoms.
What Are the Risks of Ignoring Stucco Damage Warning Signs?
Ignoring stucco damage allows localized problems to escalate into systemic failures: moisture that starts as staining can progress to sheathing rot, mold growth, compromised insulation, and structural decay, all of which dramatically increase repair complexity and cost. Beyond repairs, prolonged moisture and mold can affect indoor air quality and resale value, and emergency retrofits are far costlier than early targeted fixes. Case examples show that early sealing and targeted patching routinely cost a fraction of full-area replacement triggered by chronic neglect. Prioritizing inspections and early repairs preserves the building envelope and reduces long-term risk exposure.
After these thresholds, Solidaco (operating as Solida Coatings Ltd) provides professional stucco inspections and repair services tailored to diagnosing moisture-related failures, EIFS issues, and traditional cement stucco repair needs. Their service approach emphasizes diagnostic measurement—visual review, moisture metering, and targeted remediation—followed by matched finishing to restore appearance and performance. If your inspection reveals widening cracks, persistent staining, or bulging areas, request a professional inspection from Solidaco for an evidence-driven scope and repair recommendation.
How Can Homeowners Perform a Stucco Inspection Checklist?
A homeowner’s stucco inspection checklist helps prioritize visible and tactile checks that indicate whether DIY maintenance suffices or whether professional diagnostics are required. Start with a systematic walk-around, examine zones near windows, doors, roof intersections, and the foundation line, and document findings with dated photos. Use non-invasive tap testing and cautious probing to detect hollow or soft areas, and keep a log of measurements and observations to show to a professional if needed. The inspection steps below are ordered for safety and diagnostic clarity so homeowners can triage issues effectively before engaging contractors.
Follow these step-by-step actions for a basic inspection:
- Scan exterior zones: Walk the perimeter and visually note stains, cracks, and bulges near openings.
- Document with photos: Take dated photos of each issue from multiple angles for baseline records.
- Check sealants and flashings: Inspect caulking and visible flashing continuity around windows and roof intersections.
- Do gentle tap tests: Lightly tap suspect areas; hollow sounds or flaking indicate delamination or soft substrate.
- Monitor and compare: Re-check problematic areas after rain and dry periods to see if conditions change.
Inspection Item | What to Look For | Action (DIY / Call Pro) |
Visual cracks | Width, pattern, location | Seal hairline cracks (DIY); call pro for widening or stair-step cracks |
Discoloration/stains | Recurrent after drying, efflorescence | Investigate flashing/drainage; call pro if recurring |
Bulging/blisters | Size, spread, hollow sound | Do not puncture; call pro for moisture mapping |
Soft/hollow areas | Dull sound on tap, flaking | Avoid aggressive probing; call pro for invasive testing |
Sealants/flashings | Gaps, cracked caulk, missing flashing | Reseal small gaps (DIY); call pro for flashing failures |
What Visual Checks Should You Include in a Stucco Inspection?
Visual checks should focus on predictable problem zones: around windows and doors, roof intersections, foundation lines, corners, and areas under gutters or downspouts where water concentrates. Inspectors should look for staining patterns, gaps in sealant, cracks radiating from openings, and flecking or bubbling in the finish that could indicate trapped moisture. Take wide and close-up photos that include scale (a ruler or coin) and note weather conditions when observed, because wet vs dry states reveal different information. Systematic photographic documentation and notes create a baseline to detect propagation over time or after repairs.
These visual findings guide where tap testing and moisture measurements should be concentrated during the next step.
How to Tap and Test for Soft or Hollow Stucco Areas?
Tap testing involves lightly striking the surface with the knuckle or the back of a screwdriver handle and listening for differences—solid stucco sounds crisp, while hollow or delaminated areas sound dull or muted. For cautious probing, use a small screwdriver only where paint or finish can tolerate it, and never force through the finish; stop if you notice significant loose material. If taps indicate hollow areas or the probe encounters softness, document locations and refrain from DIY invasive removals, because probing can enlarge the problem and allow more water in. These tactile checks, combined with visual signs, help professionals decide where to use moisture meters or perform limited invasive sampling.
Knowing how to test safely leads to clear decision criteria about when to schedule a professional inspection.
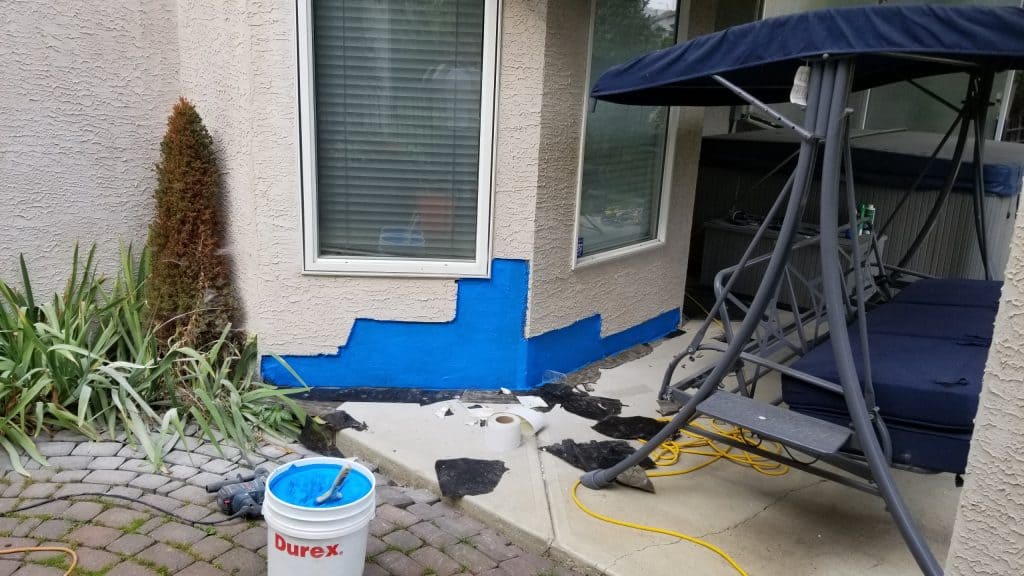
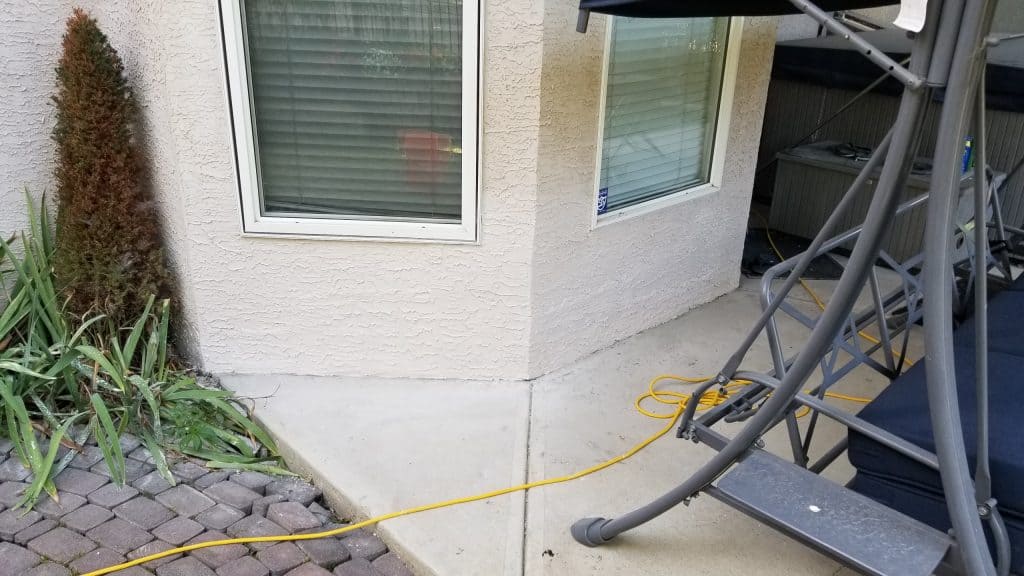
When Is It Time to Schedule a Professional Stucco Inspection?
Schedule a professional stucco inspection when you find widening cracks, repeated staining or efflorescence, bulging areas, soft or crumbling substrate, or any sign of deteriorating flashing and sealants—especially after major weather events. As a rule of thumb, annual visual checks are worthwhile, and an inspection after heavy storms, ice dams, or significant foundation movement can catch issues early. When selecting a contractor, look for clear diagnostic methods (moisture meters, thermal imaging) and a written scope that differentiates cosmetic patching from invasive repairs. Early professional evaluation preserves warranty opportunities and prevents small, repairable issues from escalating into retrofitting scenarios.
Offering professional help at this point supports homeowners who identify serious signs during DIY checks.
How Does Alberta’s Climate Affect Stucco Damage and Warning Signs?
Alberta’s climate—characterized by cold winters, freeze-thaw cycles, and strong UV exposure—exacerbates stucco deterioration by increasing thermal stress, freeze-thaw expansion in saturated pores, and progressive binder breakdown in finish coats. Repeated freeze-thaw cycles force moisture outwards, causing microcracking and spalling, while strong sunlight accelerates pigment fade and binder oxidation that weakens surface cohesion. These climatic factors make moisture management especially critical in Edmonton and surrounding areas: reliable flashing, proper grading, and vigilant gutter maintenance reduce repeated wetting and associated damage. Local season-specific maintenance—pre-winter checks of sealants and spring inspections after thaw—helps catch early warning signs before they compound.
Because climate influences damage patterns, homeowners should prioritize seasonal checks that reflect freeze-thaw and UV impacts.
What Impact Do Freeze-Thaw Cycles Have on Stucco Integrity?
Freeze-thaw cycles damage stucco by freezing water trapped in pores or microcracks, expanding and creating internal stress that widens fissures and loosens the finish. Repeated cycles, especially when combined with salts or efflorescence, accelerate granular loss and delamination, making otherwise minor cracks propagate into larger failures. Preventive measures include ensuring proper drainage, repairing sealant failures before winter, and addressing soft spots immediately. Scheduling inspections in spring after the thaw helps homeowners catch freeze-thaw consequences early and prioritize targeted repairs.
How Does UV Exposure Contribute to Stucco Deterioration?
UV exposure degrades finish coatings over time by breaking down binders and pigments, leading to chalking, loss of flexibility, and increased susceptibility to cracking and moisture penetration. Protective coatings and timely repainting restore UV resistance and maintain the finish’s ability to shed water, reducing the chance of adhesion loss and blistering. Homeowners should follow a maintenance cadence for finish coats and treat faded or chalking surfaces proactively to maintain the system’s moisture defenses. Proper finish maintenance complements flashing and drainage strategies to prevent climate-accelerated deterioration.
Why Is Moisture Management Critical in Edmonton’s Climate?
Moisture management is critical in Edmonton because the combination of precipitation, snowmelt, and freeze-thaw cycles creates repeated wetting and drying regimes that drive efflorescence, blistering, and substrate decay if not controlled. Practical measures include ensuring positive grading away from foundations, maintaining gutters and downspouts, inspecting and repairing flashings and sealants, and scheduling professional checks after major weather events. These steps interrupt moisture pathways and reduce the frequency of repairs; when repeated problems persist, a professional moisture diagnostic and possibly retrofitting are the next steps. Prioritizing moisture management preserves long-term stucco integrity in Alberta’s demanding climate.
What Are the Best Stucco Repair Solutions for Common Damage Types?
Repair solutions vary by damage type and severity: small hairline cracks can usually be sealed and refinished, localized delamination requires removal and replacement of affected sections, and widespread moisture failures may require retrofitting or replacement of the stucco assembly. Repairs that simply patch the finish without addressing moisture sources will fail repeatedly, so the best solutions combine source remediation (flashings, drainage, sealants) with appropriate material repairs—whether cement stucco patching, EIFS repair techniques, or full-area replacement. Cost, expected lifespan, and the homeowner’s tolerance for disruption guide decisions between targeted repairs and retrofitting, and professionals use diagnostic findings to recommend the most durable, code-compliant approach.
Below is a comparison table showing common damage types, repair approaches, and typical decision thresholds.
Damage Type | Repair Option | Typical Timeframe / Severity Threshold |
Hairline cracks | Seal and refinish finish coat | Minor; same-day to one-day patch |
Localized delamination | Remove affected area, dry substrate, replace base & finish | Moderate; isolated patches over few sq. ft. |
Moisture-induced rot | Remove sheathing, replace insulation, repair flashing | Severe; triggers invasive repair/retrofit |
EIFS damage | Targeted EIFS repair or system remediation | Moderate to severe depending on moisture extent |
Woodpecker or impact damage | Localized replacement and finish matching | Minor; patch and texture match |
How Does Solidaco Address Stucco Cracks and Water Damage?
For bulging and blistering caused by trapped moisture or adhesion failure, options range from localized removal and reinstallation of affected sections to more extensive removal where substrate or sheathing is compromised. Localized repairs work when delamination is limited and the underlying substrate is still sound: contractors remove the bulged material, allow proper drying, address the moisture source, and reinstall base and finish coats with correct bonding and flashings. When moisture has compromised sheathing or insulation, more invasive repairs or retrofits may be required to restore long-term performance. Determining the right option depends on moisture diagnostic findings and the extent of underlying substrate damage.
When Is Stucco Retrofitting Recommended Over Repair?
Retrofitting or replacement is recommended when damage is widespread, moisture issues are chronic across multiple areas, delamination affects large wall sections, or when structural deficiencies are present—conditions where spot repairs would likely fail. Retrofitting improves moisture management by upgrading flashing systems, adding drainage layers where appropriate, and replacing compromised sheathing; while it is more disruptive and costly upfront, it reduces long-term maintenance and repair cycles. Homeowners should consider retrofitting when they face repeated failures, when moisture diagnostics show systemic wetting, or when resale and long-term durability are priorities. Seeking multiple professional opinions helps weigh retrofit benefits against cost and disruption.
- Document the damage first: Photos and measurements guide any repair plan.
- Address moisture sources: Flashing, grading, and gutters must be fixed before cosmetic repairs.
- Choose contractors who diagnose: Look for moisture metering and clear repair scoping.