
Cost Effective and High Quality
TRADITIONAL STUCCO
REPAIRS
Residential - Commercial
GET A FREE ESTIMATE


Traditional Stucco Repairs
Solida Coatings has been helping homeowners, builders, contractors, developers and property managers throughout Western Canada for many years with traditional and cement stucco repairs. It is our mission to provide best results for your building’s exterior cladding system. We offer our services for various stucco repair projects.
Solida Coatings is a stucco contractor offering exterior coating services for both residential and commercial properties. Solida Coatings takes on any size and kind of repair project with ease, using only top quality materials from reputable suppliers which helps provide better results for your project. Solida Coatings offers free estimates for stucco repair projects.
Cement Stucco Repairs
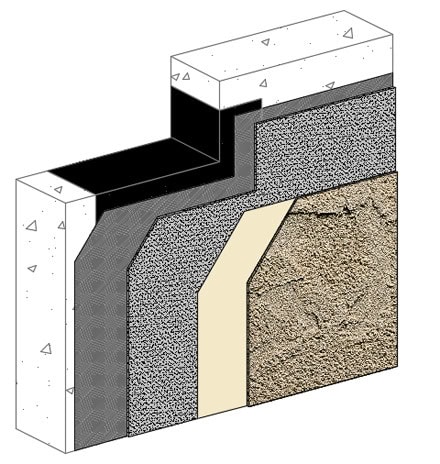
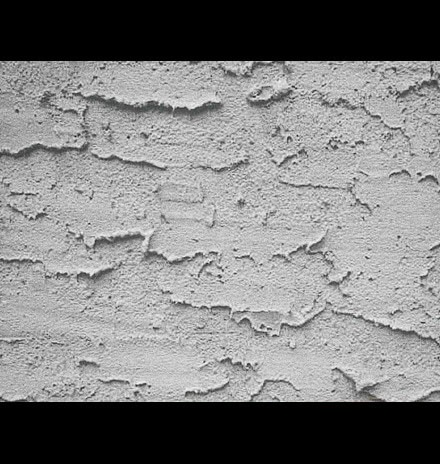
Traditional stucco commonly known as cement stucco is a 2 layer or 3 layer coating system that contains a waterproof paper or sheet (Grade D paper or Tyvek etc.), a metal wire mesh, a scratch coat then finish coat. The coating includes sand, lime and cement. After applying the scratch coat, it’s recommended to scratch the coating with a metal/hard brush while it’s damp so that it holds the finish coat. The finish coat should be applied after the scratch coat is fully cured.
Traditional stucco systems tend to be very strong against physical damage and holds itself against age, though due to being very inflexible, it tends to crack a lot in places over time, possibly due to property shift or prolonged high summer temperatures. These cracks in time can turn into deep cracks that can cause issues. Cement stucco soaks up the water and the waterproofing sheet underneath -especially if it’s a Grade D paper- gets very mushy and the water makes the plywood sheathing very swollen and mushy. This causes structural failure of the wall underneath, can cause waters leaks to the interior of the premises.
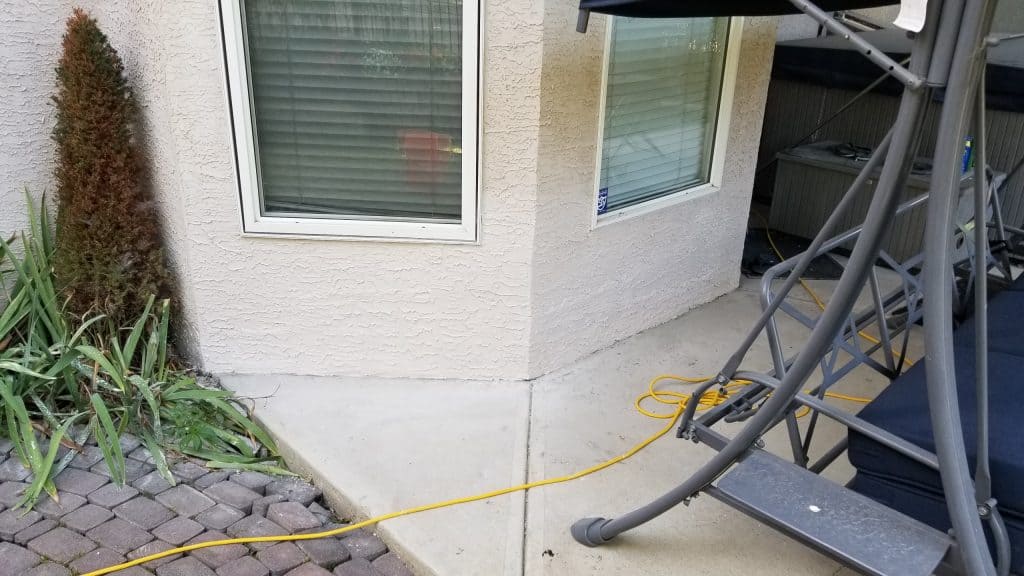
Additionally, since the cement stucco soaks up the moisture, the color deformations start to appear over time, meaning that the colors would be different on the same wall. Especially in western Canada’s weather, the cold winters make the wall colors darker due to moisture freezing in winter and thawing in summer, especially in lower parts of the walls where the flashings and stucco stoppages are applied. Also, the metal wire mesh underneath can get rusty due to water and the coating on it can crumble and fall apart.
We can help with most types of stucco repair services. Contact us today if you have any questions and would like to get a quote.
What Are the Common Types and Causes of Stucco Cracks?
Traditional stucco cracking appears in predictable patterns that reveal cause and severity, helping you decide between a DIY patch and a professional intervention. Cracks result from mechanical movement, moisture-driven deterioration, or installation defects; correctly classifying them reduces the risk of recurring failure. This section defines primary crack types, links each to common causes (foundation settlement, thermal movement, moisture intrusion), and gives quick visual checks homeowners can perform. Understanding these distinctions prepares you to select suitable repair methods and to inspect surrounding systems—roofing, gutters, and flashing—that affect the wall assembly.
What Are Hairline, Structural, and Spiderweb Stucco Cracks?
Hairline, structural, and spiderweb cracks each indicate different failure mechanisms and demand different responses. Hairline cracks are thin, typically less than 1/16 inch, often cosmetic and caused by shrinkage or minor thermal movement; they can usually be sealed or filled after cleaning. Structural cracks are wider, may be stepped at corners, or run through multiple coats and can indicate foundation settlement, framing movement, or lath failure; these require thorough diagnosis and likely professional repair. Spiderweb cracking is a network of fine fissures across a localized area, commonly from poor substrate prep or an overly stiff finish; remediation usually includes localized removal and reapplication to reestablish proper bond and flexibility.
What Causes Stucco Cracking: Foundation Settlement, Moisture, and Weathering?
Cracking mechanisms include structural movement, trapped moisture, and environmental weathering; each leaves diagnostic clues at the surface. Foundation settlement often produces vertical or stepped cracks near openings and corners; thermal cycling and differential movement create horizontal or distributed hairline cracks. Moisture intrusion causes delamination, spalling, and salt deposits; repeated freeze-thaw in saturated stucco accelerates surface loss and produces pop-outs. Poor installation—insufficient keying to lath, improper curing, or excessively cement-rich finish—creates brittle surfaces prone to spiderweb cracking. Identifying the dominant mechanism directs the correct repair sequence and substrate remediation required.
How to Identify Water Damage and Efflorescence in Traditional Stucco?
Water damage and efflorescence present specific visual and tactile clues that should change the repair scope from surface patches to substrate fixes. Water-stained discoloration, soft or powdery substrate, and bulging indicate active moisture behind the stucco; a moisture meter reading or probing the substrate confirms penetration. Efflorescence appears as white powdery salts on the surface where soluble salts migrate with moisture; while surface cleaning removes salts, the underlying moisture path must be corrected to prevent recurrence. Because sealing or patching without addressing flashing, roof drainage, or failed weep screeds allows continued deterioration, diagnosing and eliminating the moisture source is essential prior to any cosmetic work.
How Do You Repair Traditional Stucco Cracks and Damage?
Repairing traditional stucco follows a layered approach—prepare, patch, and finish—anchored by addressing root causes and using compatible materials to preserve breathability and bond. Repairs range from simple crack sealing and small patches to removal of delaminated areas, lath replacement, and full three-coat reapplications (scratch, brown, finish). Below are methods tailored to small, medium, and large repairs and guidance on when to use bonding agents, caulks, or full stucco reinstatement. Correct sequencing and curing are critical to preventing re-cracking and ensuring texture/colour match.
What Are the Step-by-Step Methods to Patch Small Stucco Holes and Hairline Cracks?
Small holes and hairline cracks require cleaning, bonding, and a well-cured finish to avoid recurring issues. First, remove loose material, wire-brush the area, and wash away dust; then apply a compatible bonding agent to improve adhesion between old and new stucco. For hairline cracks, use an elastomeric or acrylic-backed sealant if movement is expected, or a cementitious patch for purely cosmetic surface repairs; tools like a pointing trowel and sponge float create a seamless finish. Finish blending involves feathering the patch into surrounding texture and allowing proper moist curing—mist-spraying for several days—to prevent shrinkage and ensure colour stability

How to Repair Large Structural Cracks and Spalled Stucco?
Large structural cracks and spalling demand removal back to sound substrate, assessment of lath and framing, and a multi-coat reinstatement to restore structural integrity. Begin by cutting out loose stucco to solid margins, inspect for lath corrosion or detachment, and repair or replace lath and wire mesh as needed; this step often reveals moisture-related substrate problems that must be fixed. Reapply a scratch coat keyed into the lath, allow proper cure, then apply a brown coat followed by a finish coat; each layer should be mixed, applied, and cured per best practices to develop full strength and bond. Structural repairs often require staging, scaffolding, and a methodical schedule to ensure drying, curing, and long-term performance.
How Do You Match Traditional Stucco Textures and Finishes During Repair?
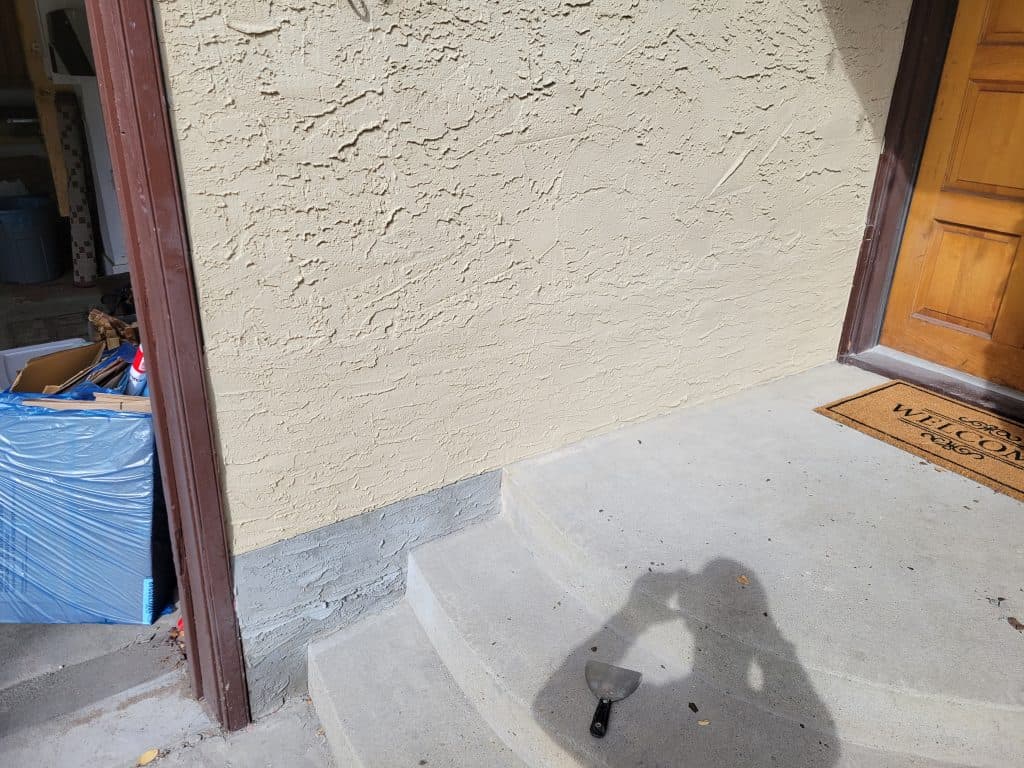
Texture matching is both an art and a repeatable technique that relies on sampling, tool selection, and practice to replicate dash, skip trowel, sand, or smooth finishes. Identify the existing texture by testing small patches in inconspicuous areas and compare aggregate size and trowel strokes; use the same aggregate grading and finish coat thickness for a consistent appearance. Common finishing tools include wooden floats for sand finishes, stainless steel trowels for smooth finishes, and specialized skip trowel knives for skip trowel texture; practice the motion on boards before committing to the wall. Colour blending and feathering at the repair edge are essential—apply thin glazes or tinted finish coats to harmonize new work with weathered existing surfaces.
How to Repair Stucco Around Windows and Doors?
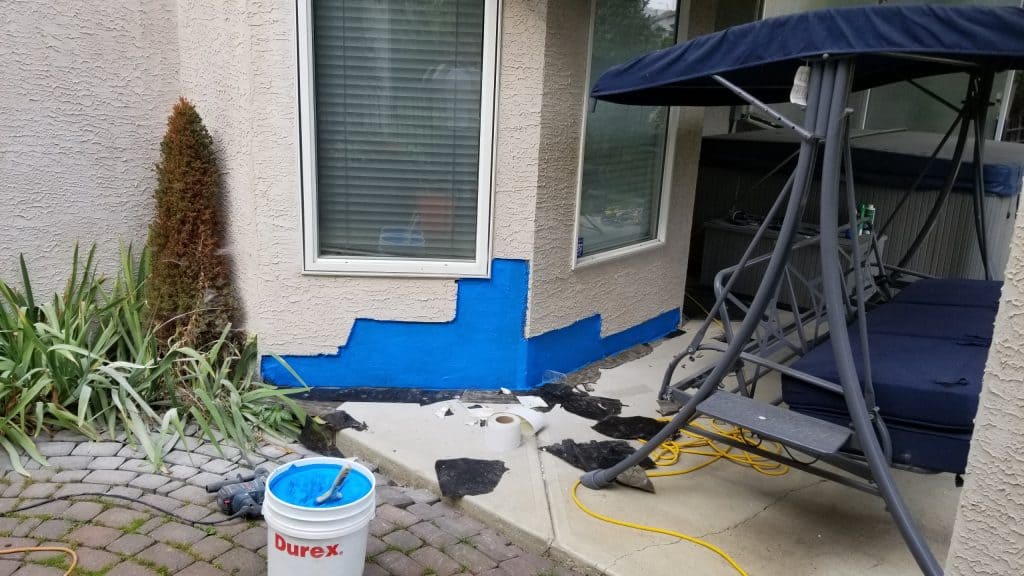
Repairing stucco around penetrations demands careful flashing, correct joint details, and sealant selection to prevent water intrusion and future failures. Inspect and, if needed, replace or extend flashing, ensure a functioning weep screed at the base, and create proper control joints around openings to accommodate movement. Use backer rod and a high-quality flexible sealant where stucco meets frames; select a breathable sealant compatible with cementitious substrates to avoid trapping moisture. Integrate the stucco repair with window trim details and inspect for signs of rot in adjacent framing—addressing those systemic issues prevents repeat water damage and preserves the repair.
What Materials and Tools Are Essential for Traditional Stucco Repair?
Successful traditional stucco repair depends on compatible mixes, appropriate bonding agents, and the right tools; selecting the correct materials preserves permeability and mechanical properties of the wall system. Repair mixes typically combine Portland cement, lime, and graded sand in specific ratios for scratch/brown/finish coats, with lime inclusion improving workability and flexibility. Bonding agents enhance adhesion on aged substrates, while sealants close movement joints; tools range from hand trowels and sponge floats to mixers and grinders. The tables below compare mix component ratios and
Which stucco mixes are best: Portland cement, lime, and sand ratios?
Choosing the correct cement-lime-sand ratio impacts flexibility, workability, and compatibility with existing traditional stucco; mixes for repair differ from new application mixes to reduce shrinkage and stiffness. Below is a practical comparison of common repair mixes used for scratch and brown coats and recommended use-cases.
Mix Component | Typical Ratio (Repair) | Purpose / Use Case |
Portland cement | 1 part | Provides strength and set; core binder in traditional stucco |
Hydrated lime | 0.25–0.5 part | Adds plasticity, improves workability and reduces cracking |
Sand (graded) | 3–4 parts | Aggregate for body and texture control; size affects finish |
Water | As needed | Controls slump; avoid over-wetting to reduce shrinkage |
For repairs, slightly higher lime content and correctly graded sand reduce brittleness and improve bond to existing stucco; follow industry guidance for mixing and conduct small mock-ups to confirm texture and colour before full application.
What Bonding Agents and Sealants Improve Stucco Patch Durability?
Bonding agents and sealants bridge old and new stucco and accommodate movement when chosen and applied correctly. Bonders (cementitious or polymer-modified) increase adhesion at the interface, especially on weathered or dust-laden surfaces; use compatible products with cement-based patches. Sealant choices—acrylic-latex for paintable, polyurethane for high-movement joints—depend on joint width and expected movement; always confirm compatibility with finish coats. Proper surface prep, primer application where required, and following manufacturer cure times prevent adhesion failures and prolong patch life.
What Tools Are Needed for Effective Cement Stucco Repair?
The right tools—both hand and power—make the difference between a durable, well-textured repair and a visible, short-lived patch; knowing when to rent versus buy saves cost and ensures access to necessary equipment.
Tool | Purpose | Rent vs Buy |
Pointing trowel / margin trowel | Apply and shape small patches | Buy for frequent use |
Hawk and 12″ trowel | Carry and apply finish coats | Buy if doing multiple repairs |
Sponge float | Texture blending and smoothing | Buy inexpensive |
Mortar mixer | Mix consistent stucco batches | Rent for single projects |
Angle grinder / diamond cup | Remove damaged stucco | Rent for occasional heavy removal |
For occasional small repairs, buying basic hand tools suffices; for larger projects involving significant removal or extensive new stucco, renting mixers and power tools is cost-effective and improves quality.
When Should You Hire a Professional for Traditional Stucco Repair?
Knowing when to call a pro saves time and prevents worsening structural or moisture problems; professionals provide diagnostic testing, substrate repairs, and warranty-backed finishes. Hire a professional when you see signs of moisture penetration, large or advancing cracks, delamination across significant areas, or when repairs require scaffolding, permit work, or historic-material matching. A qualified contractor will perform a site inspection, document moisture readings and photos, propose a scoped repair plan, and estimate labor and materials. Below are signs and what to expect from an estimate to help homeowners make informed hiring decisions.
What Are the Signs That Require Professional Stucco Assessment?
Certain red flags warrant expert assessment to prevent concealed damage from spreading and to ensure correct long-term fixes. Look for bulging panels, widespread delamination, large cracks that run through coats, repeated failures after DIY patches, or evidence of rot in adjoining framing—these indicate deeper substrate or moisture issues. Water stains inside or persistent efflorescence suggest ongoing leakage requiring flashing or roofing repairs, not just surface patching. If multiple issues coexist, a professional can sequence repairs, test moisture content, and recommend structural bracing or lath replacement when necessary.
What to Expect from a Professional Stucco Repair Estimate?
A thorough estimate includes a documented inspection, scope of work, line-item costs, and timeline; this transparency helps compare bids accurately. Expect the inspector to check flashing, weep screeds, lath condition, and to take photos and moisture readings; the estimate should list removal, substrate repair, material types, scaffolding, and labor separately. Confirm whether permits are included, what warranties are offered on workmanship and materials, and the projected cure schedule. Request references and examples of similar work, and verify insurance and licensing where applicable to reduce risk.
What Are the Benefits of Professional Traditional Stucco Restoration?
Professional restoration offers long-term value through correct substrate repair, matched textures, and warranties that protect the investment. Contractors experienced with traditional mixes and historic materials know how to preserve breathability and avoid incompatible cement-rich overlays that trap moisture. Skilled tradespeople also manage access, staging, and multi-coat cure schedules to obtain durable bonds and even coloration. Ultimately, hiring a professional can reduce lifecycle costs by minimizing rework and preventing hidden moisture damage that leads to framing rot or repeated failures.
What Factors Affect Stucco Repair Costs: Labor, Materials, and Damage Extent?
Costs are driven primarily by labor intensity, the need for scaffolding, material choices, and whether substrate repairs are required. Labor rates vary regionally and affect per-hour and per-square-foot pricing; difficult access or high scaffolding needs increase costs. Materials—polymer-modified patches, bonding agents, or specialty lime—add to material line items, and hidden scope, such as rotten framing found during removal, can further raise the total. Accurate initial inspections and itemized bids reduce surprises and help homeowners compare apples-to-apples proposals.
Per-square-foot pricing gives a quick estimate but can mislead for small, complex, or high-access jobs; below is an illustrative breakdown to contextualize per-sq-ft figures relative to typical project sizes.
Cost Element | Typical Range (2025) | Notes |
Small patch / cosmetic | $5–$15 / sq ft equivalent | Higher per-sq-ft for small isolated repairs |
Localized delamination repair | $15–$35 / sq ft | Includes lath/mesh repair and multi-coat work |
Large-area re-stucco / reapplication | $25–$60 / sq ft | Full scratch/brown/finish, scaffolding, colour matching |
Use per-square-foot numbers only as starting points—obtain itemized quotes that list substrate repairs, scaffolding, and finish matching to accurately compare contractors and prevent surprises.
How to Get Accurate Stucco Repair Estimates and Avoid Overpaying?
Request itemized bids, inspect materials and method notes, and ask for timelines and warranties to ensure fair comparison. Verify that proposals include substrate diagnostics, the number of coats, mix ratios, and texture-matching procedures; avoid vague “repair as needed” quotes. Check references and photos of prior work, and require proof of insurance and licensing where applicable. Finally, consider staging payments tied to milestones (inspection, removal, scratch/brown/finish) and insist on written warranty terms to protect against premature failure.
How Can You Maintain and Prevent Damage to Traditional Stucco?
Routine maintenance and timely small repairs dramatically extend the life of traditional stucco systems by preventing moisture entry and structural deterioration. Maintenance focuses on preserving drainage, controlling vegetation, inspecting flashings and weep screeds, and addressing minor cracks promptly. Proper sealing and breathable treatments applied judiciously, combined with seasonal inspections, reduce the risk of delamination and spalling. The following lists and checklist provide actionable tasks and intervals for property owners to follow.
What Are the Best Preventative Maintenance Practices for Stucco?
Routine maintenance prevents small issues from becoming large repairs and preserves the wall assembly’s ability to shed moisture. Keep gutters and downspouts clear to avoid overflow that soaks walls; trim vegetation that contacts stucco to prevent trapped moisture and physical abrasion. Inspect and maintain flashing around openings, reseal joints as needed, and repair cracks under 1/16 inch promptly to prevent water ingress. Regular checks and small repairs reduce the need for disruptive large-area remediation.
- Maintenance tasks to perform monthly and annually: Monthly: Visually inspect gutters and downspouts for blockages and ensure water is directed away from walls. Quarterly: Check sealant joints at windows and doors for gaps or adhesive failure and re-seal where needed. Annually: Inspect all flashing, weep screeds, and roof-to-wall intersections and schedule professional inspection if any anomalies appear.
Summary paragraph: A disciplined maintenance schedule focused on drainage, flashing integrity, and early crack treatment prevents moisture-driven failures and lowers lifecycle repair costs
How to Seal and Waterproof Stucco Surfaces Effectively?
Sealing stucco requires a balance—choose breathable treatments for cement or lime-rich finishes to avoid trapping moisture behind the coat. Use silane/siloxane penetrative water repellents for breathable water shedding, and avoid thick, non-breathable coatings that can exacerbate freeze-thaw damage. Apply sealants to joints, not to entire walls unless a breathable product is specified, and always follow manufacturer temperature and substrate moisture conditions for application. Periodic reapplication schedules vary by exposure; targeted treatment of vulnerable facades (coastal or high-humidity areas) improves longevity.
Effective Stucco Repair Method for Brick Walls: Enhancing Adhesion and Durability During the operation of buildings, plaster coatings of the external and internal enclosing surfaces of brick walls are subjected to various destructive influences. Existing methods of repairing plaster coatings do not fully ensure strong adhesion of the material of the repair layer of plaster to the surface of the repaired brick wall structure. In addition, these methods can only get rid of damage but do not improve the operational properties of the plaster layer of the repaired structure. Thus, the urgent problem is the development of an effective method of repairing plaster coatings on the surfaces of brick walls, due to which it will become possible to ensure the monolithic of the repaired plastering structure. In order to address the shortcomings of the existing plaster coating repair techniques on the surfaces of the brick walls and finding ways to improve it, by the authors investigated the possibility and the expediency of performing the repair of additional process steps. A feature of this repair method is the use of preheated plaster mortar, flexible plaster molding, as well as compaction of the stucco mortar in the contact area with the repaired brick wall structure with a deep plate compactor. The test results of samples of plaster coatings manufactured by the proposed method showed the high efficiency and feasibility of using this method for repairs on the external and internal surfaces of walling of brick walls and are mentioned in the patent for the invention of the Russian Federation. The performance characteristics of the plaster are significantly increased as a result of the application of this method, and, consequently, the service life of the plaster coating is increased several times. Stucco repair method for enclosing brick walls, 2019
What Is a Seasonal Stucco Inspection Checklist?
Seasonal inspections catch early damage and guide pre-emptive maintenance to protect stucco across climates. In spring, check for winter freeze-thaw damage and inspect attic and roof flashings for leaks; repair any cracked sealant and clean gutters. In summer, look for new hairline cracks and check for salt intrusion in coastal zones; in fall, ensure drainage paths are clear and prepare for winter by repairing flashing and verifying downspout function. If inspections uncover bulging, persistent damp areas, or large cracks, schedule a professional assessment promptly.
- Seasonal checklist highlights: Spring: Remove winter debris, check for new cracks, and replace damaged sealants. Summer: Inspect for moisture staining and efflorescence; clean affected areas and monitor. Fall/Winter Prep: Clear gutters, confirm positive drainage, and protect vulnerable areas from freeze-thaw exposure.
Summary paragraph: A concise seasonal checklist focuses attention on drainage, joint integrity, and signs of moisture, enabling homeowners to act before issues require major repairs.
What Are the Best Practices for Historic and Regional Traditional Stucco Repair?
Historic stucco preservation prioritizes material compatibility, breathability, and documentation, while regional climates and local building codes shape material choices and detailing. When working on historic lime-rich stucco, use in-kind mixes and avoid high-cement overlays that stiffen the assembly and trap moisture. Coastal, cold-climate, and seismic regions each require adapted detailing—salt-resistant materials near oceans, freeze-thaw tolerant mixes in cold climates, and flexible jointing in seismic areas. Case studies below illustrate common successful approaches and lessons learned.
How Does Historic Stucco Preservation Differ from Modern Repairs?
Historic preservation emphasizes matching original material properties, workability, and permeability to avoid long-term harm to the structure. Lime-rich historic stucco offers greater breathability and flexibility than modern cement-heavy mixes; replacing it with incompatible cementitious patches risks accelerating decay. In-kind repairs, documented sampling, and conservation approvals are often required for listed properties. When in doubt, testing and small mock-ups help confirm that new work will age similarly and maintain the historic fabric’s moisture balance.
How Do Climate and Local Building Codes Affect Stucco Repair Approaches?
Regional climate and codes change detailing, material selection, and inspection triggers for stucco repair work. Coastal environments require corrosion-resistant lath and formulations tolerant of salt exposure, while cold climates necessitate attention to freeze-thaw-rated aggregates and longer curing practices to prevent pop-outs. Local codes may mandate specific flashing, control joints, or inspection processes—confirm requirements before commencing work to ensure compliance and avoid costly rework. Understanding both climate-driven performance issues and code obligations leads to repairs that endure.
What Are Case Studies of Successful Traditional Stucco Repairs?
Illustrative case studies reveal practical diagnostics and repair choices that succeeded in different scenarios. One case involved active moisture-driven delamination where the successful strategy combined roof and gutter repair, removal of delaminated stucco, lath replacement, and staged three-coat reinstatement with breathable finishes. Another focused on historic lime-stucco matching: analysis of original mix, replication with a lime-rich repair mix, and careful finishing produced a near-invisible repair that preserved breathability. Key takeaways include fixing the moisture source first, using material-compatible mixes, and documenting mock-ups before full application.
- Water-intrusion delamination: Diagnose leakage, repair flashing, and reapply three-coat system.
- Historic lime match: Test original materials, use in-kind lime-rich mixes, and perform mock-ups.
- Coastal exposure: Use corrosion-resistant lath and salt-tolerant finishing approaches.
Summary paragraph: These case studies underscore that diagnosing root causes and selecting compatible materials are the most important steps toward durable, aesthetically successful traditional stucco repairs.
Get a Free Quote for Traditional Stucco Repair
Every project is unique and requires a different approach. Working with variety of suppliers and manufacturers ensure that we deliver the best results.