
Cost Effective and High Quality
CALGARY
STUCCO REPAIR SERVICES
Residential - Commercial
GET A FREE ESTIMATE
Expert EIFS Stucco Repair Services in Calgary
Stucco Repairs


Professional Stucco Repairs in Calgary
Stucco repair in Calgary requires a focused approach that accounts for local climate stress, material types, and long-term waterproofing strategies. Solida Coatings has been helping homeowners, builders, contractors, developers and property managers throughout Calgary and surrounding areas for over 14 years with stucco repair projects. It is our mission to provide best results for your building’s exterior cladding system.
Solida Coatings is a stucco contractor offering exterior coating services for both residential and commercial properties. Solida Coatings takes on any size and kind of repair project with ease, using only use top quality materials from reputable suppliers which helps provide better results for your project. Solida Coatings offers free estimates for stucco repair projects in greater Calgary and surrounding areas.
Stucco Repair Services
Due to external factors or negligence while installing, stucco might have problems that require repairs. Solida Coatings can easily solve your stucco related problems. Whether it’s water leakage, damaged walls or color fades, we’ll be more than happy to provide you with the best results. We offer the following stucco repair services;
- EIFS Repairs
- Cement Stucco Repairs
- Water Leakage & Moisture Damage Repairs
- Crack Repairs
- Blistering and Bubbling Repairs
- Woodpecker Damage Repairs
If the damage is too serious for a stucco repair service, it is highly recommendable to go with stucco retrofitting. Retrofitting will not only get rid of the existing issues, it will also provide your building’s exterior with a fresh stucco application with all the benefits. Additionally, retrofitting is an convenient and affordable way for buildings to have a fresh look while gaining extra protection and visual appeal. Contact us today for your free estimate today.

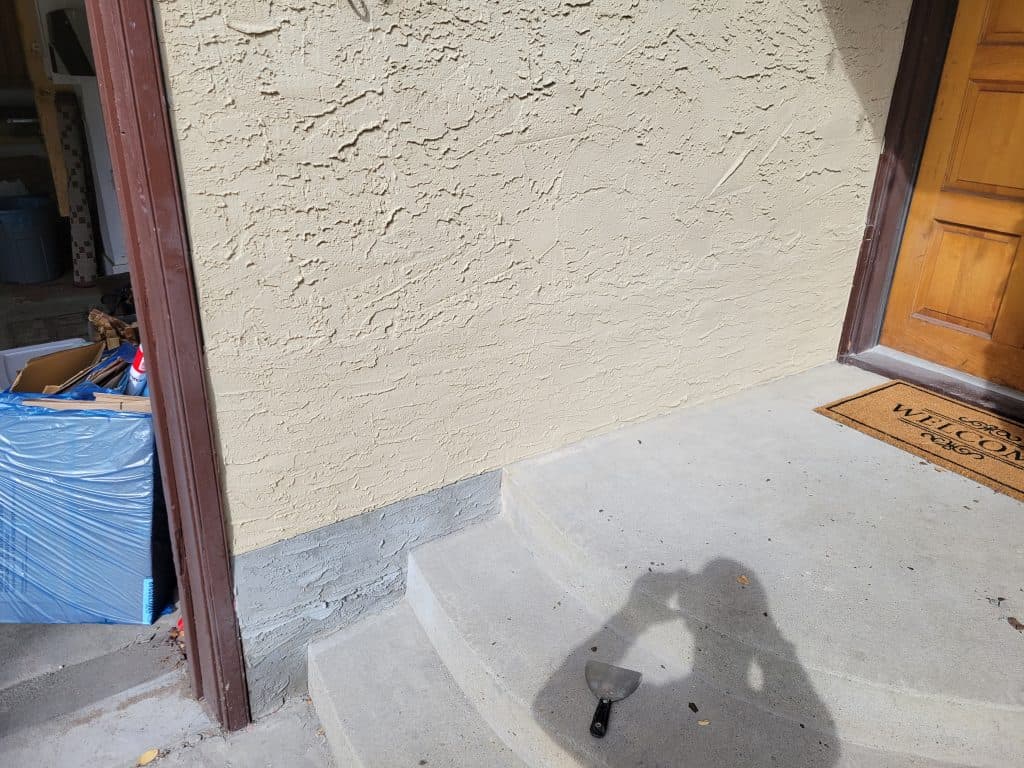
What Are the Most Common Types of Stucco Damage in Calgary?
Common stucco damage in Calgary includes cracking, water intrusion, woodpecker impacts, hail and impact dents, and bulging or delamination caused by trapped moisture or failed adhesives. Each damage type has distinct visual cues and implications for the building envelope, and quick identification helps prioritize repairs before deterioration spreads to sheathing or framing. Diagnosing the root cause—whether freeze-thaw stress, flashing failure, or animal activity—is essential because the repair path differs substantially between surface cosmetics and substrate remediation. The following subsections describe how these damage types develop and what immediate homeowner actions deliver the best outcomes.
How Do Stucco Cracks Develop and How Are They Repaired?
Stucco cracks develop from multiple causes: hairline shrinkage cracks from curing, pattern cracks from movement at control joints, or structural cracks indicating differential settlement; the cause determines the repair technique. Repair generally begins with a careful probe and cleaning to remove loose material, application of appropriate backing or mesh for wider cracks, and layered patching—scratch coat, brown coat, and finish coat—followed by texture replication and painting. For hairline cracks, flexible caulks or acrylic fillers can suffice, while wider or recurrent cracks often require substrate correction and possibly engineering input to address structural movement. Prompt repair prevents moisture ingress that could lead to rot or delamination, so homeowners should document crack patterns and monitor for progression before scheduling work.
What Causes Water Damage in Edmonton Stucco and How Is It Fixed?
Water damage in stucco commonly occurs where barriers fail—poor flashing, damaged sealants around windows, or grading that allows splashback—and leads to rot, mould, and delamination if left unchecked. Diagnosis begins with visual inspection and moisture testing behind finishes to locate intrusion points. Remediation follows a strict sequence: stop the source (repair flashing, grade, or penetrations), dry the assembly, remove damaged stucco or sheathing, repair substrate and WRB, and re-apply compatible stucco systems. Preventing recurrence involves upgrading drainage planes and ensuring continuous, well-installed flashing and seals.
Addressing the source first is essential because surface repairs alone will fail if moisture pathways remain. Once moisture is controlled, EIFS and parging-specific issues require different diagnostic attention.
Recognizing crack patterns naturally leads to examining water damage indicators and remediation, which is the next critical area.
What Causes Stucco Water Damage and How Is It Fixed?
Stucco water damage often stems from failed flashing at windows and doors, clogged or misdirected gutters, improper membrane installation behind EIFS, or penetrations where sealants have failed; these entry points allow moisture to reach sheathing and cause delamination or rot. Diagnosis uses moisture meters, interior staining checks, and targeted openings to confirm the extent of substrate saturation, followed by drying, sheathing repair or replacement, and reinstatement of correct flashing and membranes. Effective repairs restore the drainage plane, replace compromised substrate, and ensure a continuous moisture barrier before reapplying stucco layers to prevent recurrence. Addressing the source of water intrusion is the essential first step; surface patching without fixing the entry point will inevitably fail.
Once moisture is controlled, specialized fixes for animal damage are often needed, such as for woodpeckers described next.
How Does Woodpecker Damage Affect Stucco and What Are Repair Solutions?
Woodpecker damage appears as clustered holes or peck marks concentrated around eaves or siding transitions, and while often superficial initially, repeated strikes can puncture the outer coats and damage the foam or sheathing underneath. Repair typically involves patching holes with compatible repair mortars or patching compounds, reinforcing weak areas with protective mesh or sheathing, and concealing repairs via texture replication and repainting. Prevention strategies include installing protective screening, using visual deterrents or auditory devices, and altering nearby habitat elements that attract woodpeckers, reducing the chance of repeat strikes. Combining a structural patch with humane deterrents helps preserve the repair and the integrity of the exterior envelope.
With animal and moisture risks discussed, it’s important to consider how Calgary’s climate accelerates certain failure modes, which we address next.
How Does Calgary’s Climate Impact Stucco Durability?
Calgary’s climate influences stucco durability through frequent freeze-thaw cycles that cause expansion and contraction, hail events that produce impact damage, and temperature swings that stress sealants and joints; these mechanisms accelerate cracks, blistering, and delamination when moisture is present. Proper detailing—flashing, weeping screeds, and sufficient slope at window sills—mitigates many climate-driven failures, and seasonal inspections timed after spring thaws and before winter freezes help catch problems early. Homeowners should plan for periodic touch-ups and monitor high-risk zones like roof-wall intersections and exposed eaves where ice and wind-driven rain concentrate. Understanding these climate drivers informs maintenance schedules and material choices that extend the life of stucco systems in Calgary.
These climate-specific maintenance practices feed directly into the choice of repair methods tailored to different stucco systems, discussed next.
What Are the Different Types of Stucco and Their Repair Methods in Calgary?
Different stucco systems—traditional cement stucco, acrylic stucco, and EIFS—require distinct repair approaches because they vary in layering, flexibility, and drainage requirements; choosing the right method preserves aesthetics and long-term performance. Traditional cement stucco relies on layered scratch, brown, and finish coats over metal lath and demands careful curing and texture matching. Acrylic stucco is more flexible and often requires specialized primers and color-matching techniques. EIFS is a layered system with insulation and often a drainage plane; repairs must prioritize moisture barrier integrity and follow manufacturer protocols. The table below compares these systems and the repair considerations each requires in Calgary’s climate.
Stucco Type | Typical Durability | Repair Considerations |
Traditional cement stucco | 30–50 years with proper maintenance | Layered repair (scratch/brown/finish), re-lathing if substrate damaged, curing time critical |
Acrylic stucco | 20–40 years depending on finish | Adhesion and color-match concerns, use compatible primers and flexible patch materials |
EIFS (synthetic stucco) | 20–35 years, sensitive to moisture | Inspect/repair air/moisture barrier, follow manufacturer methods, address delamination carefully |
This comparison clarifies why a different inspection and repair protocol is required for each stucco system, and the following subsections explain practical repair steps for each type.
How Is Traditional Cement Stucco Repaired?
Repairing traditional cement stucco typically involves removing loose or damaged material back to solid substrate, checking and repairing metal lath and weep screed, and reapplying the layered system: scratch coat, brown coat, then finish coat with texture matching. Each coat has curing and drying time requirements—often several days to a week depending on conditions—so scheduling in Calgary’s cooler months requires planning. Texture replication is an art: contractors use practice patches and feathering to blend new work with existing surfaces before priming and painting. Ensuring proper flashing and drainage during the repair prevents recurrence of moisture-related failures.
These layered methods contrast with the adhesion- and color-focused repairs needed for acrylic stucco, covered next.
What Are the Repair Considerations for Acrylic Stucco?
Acrylic stucco repairs demand attention to adhesion, flexibility, and color retention; patches must bond to the existing acrylic finish using compatible primers or bonding agents, and flexible patch materials are selected to accommodate thermal movement. Color matching can be challenging because acrylic finishes age differently, so contractors often apply a full-coat repaint over the elevation or blend in staged feathering to minimize visible transitions. Preventative measures include inspecting seals at penetrations and maintaining paint systems that protect the acrylic finish from UV and hail degradation. Proper product compatibility and surface preparation are critical to long-term success.
After addressing acrylic considerations, EIFS-specific protocols and moisture management become the priority for synthetic systems.
How Is EIFS Stucco Repaired and Maintained?
EIFS repairs prioritize restoring the moisture management plane and repairing delaminated or damaged insulation-backed components while following manufacturer-specified methods to avoid warranty issues. Inspection focuses on sealant joints, window details, and transitions where water can bypass the drainage plane; any compromised insulation board or adhesive must be removed and replaced with approved materials. Because EIFS can trap moisture if installed or repaired incorrectly, certified applicator procedures and attention to cladding drainage are essential for durable fixes. Routine maintenance—replacing failed sealant, inspecting flashings, and ensuring proper slope at penetrations—reduces the likelihood of repeated delamination.
Understanding system-specific repair method sets the stage for a concise, practical repair workflow, which follows in the next section.
What Is the Step-by-Step Process for Stucco Repair in Calgary?
A consistent repair workflow ensures durable outcomes: begin with a thorough inspection and diagnosis, then execute targeted preparation, layered patching or replacement, finishing and texture matching, and finally protective painting and warranty documentation. This process treats the exterior as a building-envelope system—addressing moisture paths and substrate integrity before cosmetic finishes—so repairs last through Calgary’s variable weather. The numbered steps below are designed for homeowner understanding and to guide discussions with contractors when obtaining written quotes and scopes of work. Following a structured process reduces the risk of overlooked moisture damage and protects the home’s structural components.
Now follow the practical, snippable step-by-step procedure below.
- Inspection and Diagnosis: Use non-destructive probing, moisture meters, and interior checks to map damage and locate moisture sources.
- Surface Preparation: Remove failed stucco to sound substrate, repair or replace lath/sheathing, and ensure clean, dry surfaces for bonding.
- Patching and Layering: Rebuild layers (scratch → brown → finish) or apply compatible patch compounds with mesh reinforcement where needed.
- Finishing and Painting: Texture-match, prime, and apply weather-rated paint or protective coatings; document the work and warranty terms.
How Is a Stucco Damage Inspection Conducted?
A proper stucco inspection combines visible exterior assessment with diagnostic tools: moisture meters identify elevated substrate moisture, probing locates loose material, and interior checks reveal stains or mould that indicate water entry. Inspectors should record locations, take photos, and test suspect areas with small openings when moisture levels or delamination signs suggest deeper issues; this targeted opening prevents unnecessary demolition. The inspection report should note stucco type, flashing details, and any evidence of poor drainage or failed sealants so the repair scope addresses root causes. Clear documentation and baseline photos also help homeowners compare contractor estimates and warranty claims.
Accurate inspection findings determine the level of surface preparation required before repair, discussed next.
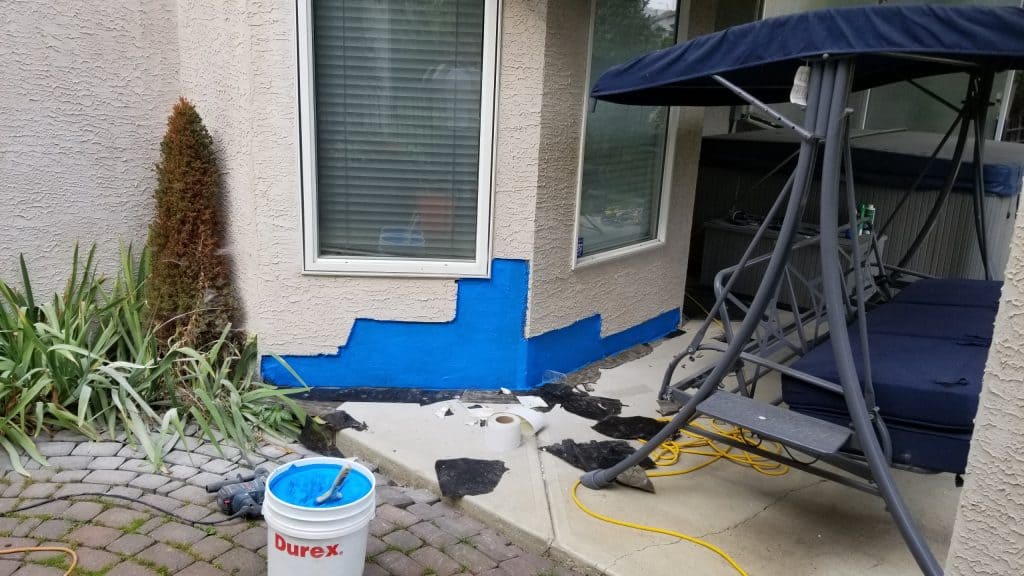
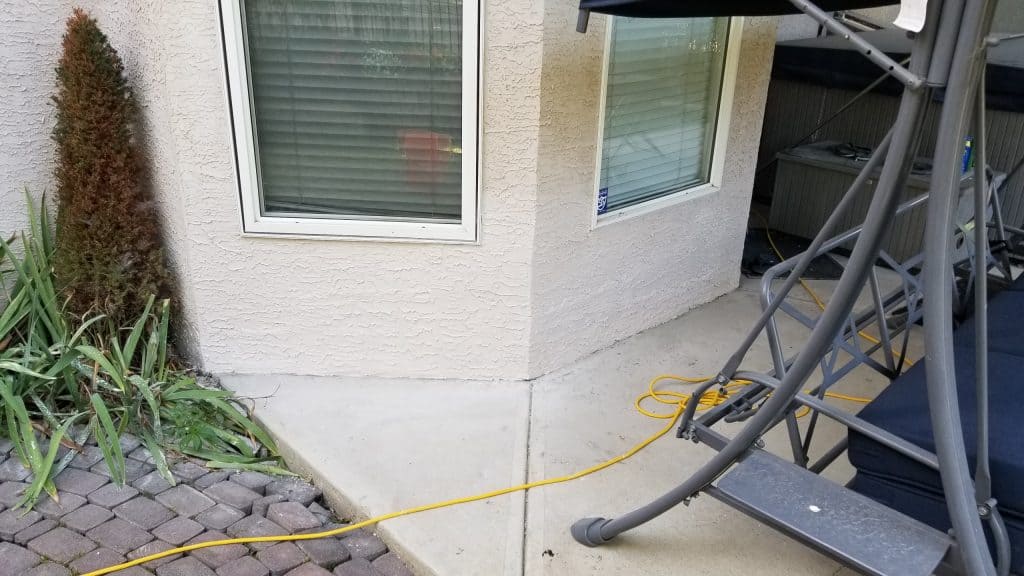
What Surface Preparation Is Needed Before Repair?
Surface preparation ensures adhesion and longevity: remove loose or contaminated stucco, repair or replace damaged lath or sheathing, and verify that flashings and drainage components are intact before applying new material. Cleaning, drying, and applying appropriate primers or bonding agents to the substrate are essential steps, particularly for acrylic surfaces or where EIFS repairs must interface with membranes. Proper preparation also includes temporary protection against weather while the substrate cures—crucial in Calgary to avoid freeze-thaw damage during setting. Ensuring a sound base for patching reduces the chance of delamination and extends the repair lifespan.
How Are Stucco Cracks and Holes Patched and Blended?
Patching cracks and holes begins with removing unstable material, installing backing or mesh reinforcement for deeper cavities, applying compatible patch mortars in layers, and finishing with texture replication that blends into the surrounding finish. Practice patches and feathering techniques help match the texture, and color blending may require a full elevation repaint or staged tinting to minimize visible seams. Environmental conditions—temperature, humidity, and wind—should be within acceptable ranges to ensure curing; in Calgary, scheduling around frost and heavy precipitation is important. Careful layering and finish work ensure structural repair and visual continuity.
Finishing touches include paint and warranty handoff that protect the investment, which is the final step below.
What Finishing and Painting Steps Ensure Seamless Repair?
Finishing requires priming patched areas with a compatible primer, applying breathable, weather-rated paint systems suited to Calgary’s climate, and using blending techniques to unify old and new surfaces without obvious transitions. When color matching is difficult, contractors may recommend a full-face repaint for the best aesthetic result and to ensure uniform protective coating across the elevation. Document the paint product, application method, and warranty terms in the final report so homeowners understand maintenance intervals and coverage. A thorough handoff with photos and maintenance guidance helps preserve the repair and reduces future issues.
How Can Calgary Homeowners Maintain Stucco to Prevent Future Damage?
Proactive maintenance tailored to Calgary’s climate extends stucco longevity: schedule seasonal inspections after spring thaw and before winter freeze, maintain flashing and gutters, and promptly repair small cracks to avoid moisture penetration. Regularly inspect roof-wall intersections, window and door flashings, and transitions at decks or canopies where water can be driven into the cladding. Proper drainage—clean gutters, ensure downspouts direct water away from the foundation, and maintain slope at ground level—reduces the frequency of costly repairs. The following seasonal checklist gives homeowners concrete tasks to keep stucco systems healthy year-round.
- Spring inspection and repair tasks:Check flashing and window/door seals for failing sealant and re-seal as needed. Clean gutters and downspouts to prevent overflow that soaks stucco bases. Inspect for new cracks or bulges and document changes with photos.
- Summer maintenance and monitoring:Look for paint failure or surface erosion and patch small areas promptly. Trim vegetation away from walls to discourage bird activity and moisture trapping. Check for hail or impact damage after severe weather events.
- Fall/winter preparation:Ensure drainage away from foundations and remove debris that holds moisture. Replace degraded sealants around penetrations before freeze-thaw stress begins. Schedule any major repairs for milder conditions when possible to ensure proper curing.
What Are Seasonal Stucco Maintenance Tips for Calgary’s Climate?
In Calgary, perform a spring inspection to repair winter salt and freeze-thaw damage and a fall check to ensure seals and drainage are ready for winter; these seasonal touchpoints reduce the likelihood of moisture-related deterioration. During warm months, watch for paint breakdown and hail impacts and address them quickly to maintain protective coatings. For each season, document conditions with photos and notes so trends over time can be tracked and used in contractor discussions. These recurring habits reduce emergency repairs and maintain warranty coverage where periodic maintenance is required.
How Does Proper Waterproofing Protect Stucco?
Proper waterproofing comprises continuous flashing, correctly installed membranes at roof-wall and window intersections, and properly integrated weep screeds to channel water away from sheathing; these elements form the building’s drainage plane. A moisture barrier protects the substrate from direct wetting, and correctly flashed openings prevent water from bypassing that barrier; inspect these details regularly. Clearing gutters and ensuring downspouts direct water well away from the foundation reduces capillary wicking into lower stucco sections. Ensuring waterproofing details function correctly is foundational to long-term stucco performance and reduces the need for invasive repairs.
How Can Woodpecker Damage Be Prevented?
Prevent woodpecker damage by combining structural protections—like installing lightweight protective mesh or panels over high-risk areas—with habitat and deterrent strategies such as visual decoys, limited auditory devices, and trimming trees that host insects or nesting opportunities. Protective screening installed before finishes are applied or added as retrofit on vulnerable eaves and siding junctions prevents repeated impact damage. For persistent neighbourhood activity, coordinated habitat management (removing insect-attracting wood piles, for example) reduces the incentive for woodpeckers to remain. Pairing repair with prevention ensures longevity and reduces repeat repair costs.
What Are the Signs That Stucco Needs Full Replacement?
Signs that justify full replacement include widespread delamination or bulging across large wall areas, chronic moisture readings behind the stucco in multiple locations, repeated failures after previous repairs, and significant substrate rot requiring extensive sheathing replacement. When inspection finds multiple failure points, an invasive envelope assessment may be warranted to quantify the extent of hidden damage and to calculate whether deep remediation costs approach full replacement. Photo documentation and moisture profiles from multiple elevations help determine whether localized patching or wholesale replacement will be more economical in the long run. Replacement becomes preferable when ongoing repair cycles and associated risks of unseen structural damage outweigh the up-front cost.
How Much Does Stucco Repair Cost in Calgary?
Stucco repair cost in Calgary varies by the type of damage, stucco system, and access requirements, but homeowners can expect distinct price bands for small patches versus larger sectional or full-envelope work. Costs rise when hidden moisture remediation, substrate replacement, scaffolding, or texture and color matching are required, and prices reflect both material and skilled labour for layered repairs like scratch, brown, and finish coats. The following table compares common repair scopes, giving a quick reference to expected cost ranges, typical timelines, and usual warranty practices so you can prepare realistic budgets. Understanding these categories helps you request detailed, itemized estimates from contractors and avoid surprise charges that stem from underlying water damage.
Introductory EAV comparison of common stucco repair scopes:
Repair Scope | Typical Cost Range (CAD) | Time to Complete | Typical Warranty |
Hairline crack repair | $150 – $400 per crack | 1–2 hours | 30–90 days (workmanship) |
Local patch / sectional re-skim | $500 – $2,500 | 1–3 days | 1–5 years (workmanship/materials) |
Partial wall replacement (large patch) | $2,500 – $8,000 | 2–7 days | 2–7 years |
Full stucco replacement (envelope) | $10,000 – $45,000+ | 1–3+ weeks | 5–15 years (depends on materials) |
This table highlights how repair complexity correlates with cost and schedule; small crack repairs are inexpensive, while full replacements involve more labour, scaffolding, and moisture remediation, which drives price increases. With this cost framing in mind, the next section breaks down the specific factors that most influence pricing.
What Factors Influence Stucco Repair Pricing in Calgary?
Several variables directly influence stucco repair pricing in Calgary, including the stucco type (traditional cement, acrylic, EIFS), extent of visible damage, and any hidden moisture or substrate problems discovered during inspection. Labour-intensive tasks—like removing failed stucco to the lath, replacing metal lath, or reinstalling weeping screeds—raise costs, as do access challenges that require scaffolding or specialized lifts. Matching texture and color typically adds 10–30% to a patch cost because it may require re-skim coats and blending, and warranties that include moisture-related coverage often increase the estimate due to manufacturer or applicator requirements. Understanding these drivers helps homeowners ask contractors targeted questions about scope and contingencies when comparing bids.
What Are Typical Price Ranges for Stucco Repairs?
Typical price ranges depend on whether the job is a targeted patch, a sectional re-skim, or full replacement, and Calgary-specific factors like seasonal demand and local contractor availability affect final quotes. Small patch repairs for hairline cracks or minor surface chips commonly fall under a few hundred dollars, while larger sectional repairs or re-skim work are usually quoted in the low thousands due to layered application and curing time. Full replacement of stucco across an elevation is substantially more expensive and includes costs for removing old material, inspecting and repairing substrate or sheathing, reinstalling flashing, and applying new coats, often reaching five figures on average. Hidden rot or pervasive moisture intrusion can double or triple initial estimates, which is why contingency line items are important in written bids
OUR SUPPLIERS
Every project is unique and requires a different approach. Working with variety of suppliers and manufacturers ensure that we deliver the best results.